13 Tips from a Celebrity Make-up Artist
As a professional make-up artist I have seen the gamut of skin types and conditions. Having a regular skin care routine is one of the single most important things you can do to achieve a flawless look. Healthy skin will appear glowing and radiant, unhealthy skin can make you look older and give your complexion a dull look. Follow these easy 13 steps to enhance your skin and give your make-up a smooth, beautiful finish.
 Step 1: Understand your skin type. Following a daily regimen will help to even out and balance every skin variety. Skin types vary from dry to oily to very damaged and it is important to assess what your skin needs are and then address it every day. If you can’t determine your skin type on your own consult an Aesthetician or Dermatologist. Consistent and careful skin care will not only help you look your best now, but for years to come.
Step 2: Consider the occasion. Everyday looks are simple and often very natural looking. For events or weddings you may want to consider a more voluptuous look with an emphasis on your eye make-up, bronzer and blush. During the summer months stick to matte finishes and light colors to avoid shiny and heavy looks; during the winter month’s darker colors and glossy lips look stunning.
Step 3: What do you want to accentuate? Make-up is all about making you feel good! If your eyes are your favorite feature then you will want to play up your eyeliner and mascara. Defined cheeks are very beautiful and are enhanced with a well placed blush. Lips look lush and divine with the right lip shade in a matching undertone (yellow, blue, or pink) and a little bit of sheen.
Step 4: Start with clean, sanitized brushes and tools. Frequently, and I mean weekly, cleaning with the right kind of brush cleanser will make your application easier, products go where they are suppose to on your face instead of clinging to a dirty brush. Clean tools will also prevent contamination and bacteria build up of skin oils and old, used colors which can lead to breakouts and skin irritation. Keeping your brushes and tools in good condition will also make them last longer, which is important to your bottom line if you buy a quality set. If you apply your foundation or blush with a sponge replace it weekly.
Step 5: Moisturize and Prime. Supple, moisturized skin is the best way to fight premature aging and fine lines. Apply a good moisturizer ten to twenty minutes prior to your makeup application, this will help to prevent moisture loss throughout the day and will provide a soft canvas for your make-up. Make-up primer is ideal for most skin types, primer helps to make your application long lasting and remain natural looking. If your skin is oily or problematic, switch to a mattifier instead of a primer. Preferably use a water based primer which will work naturally with your skin; Silicone primers sit on top of the epidermis and can cause irritation, prevent the skin from breathing, and trap bacteria. Use four small drops and apply on your cheeks, chin and middle of your forehead, just above the bridge of your nose.

Step 6: Concealer or Camouflaging. To achieve a uniform, flawless finish with your skin is easy when you use concealer the right way. Using a small, rounded brush gently dab three to four spots around dark circles, and one to two spots on skin splotches or birth marks, depending on size. Then softly blend these dabs together by sweeping the brush lightly in an upward motion. Concealer should only be one to two shades lighter than your foundation make-up.
Step 7: Apply your foundation base. Choosing the right kind of foundation is critically important for your skin type, the wrong kind of foundation will irritate and aggravate your skin. Gerda Spillmann Swiss Skin Care makes a beautiful cream to powder foundation that works with all skin types; this is what I prefer to use on all of my clients. Using a large foundation brush, like a Kabuki, apply your foundation in the center of your face and blend towards your hairline and into your neck. Brush strokes should be light and using upward motions to give you the most natural, complete finish. Repeat this process 2-3 times for special occasion make-up to give you a buildable, fuller coverage look.
Step 8: Highlighting and Bronzing. Highlighting just above your cheek bones, under your eyebrows and sometimes the corners of your eyes will give you a fresh, clean look. Keep highlighting simple and light, if this is overdone the effect gives you a chalky finish. Bronzing is a fantastic way to add a bit of color. Apply across the top of your forehead and a bit on the bridge of your nose for a soft, sunkissed look. Some will also use Bronzer on the cheeks in place of a blush but I have always felt that a soft blush will enhance a natural, youthful glow.
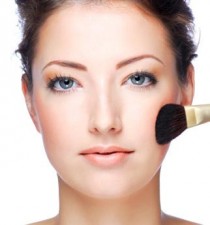
Step 9: Beautiful with Blush. Cream blush will give you a consistent, soft finish; Powder blushes are easy to apply but harder to blend; Liquid or shimmer blush can be tacky and inconsistent. Find the apples of your cheeks by smiling big, then apply your blush in a “C” shape starting on the cheeks and finishing by your temples. Blending is critical to avoid a clownish appearance. Blush colors should be chosen for the warmth they give to your skin. If you have a pink undertone stick to pink shades, yellow under tones are enhanced nicely with corals, olive skin try golden or bronze colors, darker skin tones are beautiful with blushes complimented in burgundy or wine colors.

Step 10: Apply a Powder. Translucent powder will help to set your make-up, allowing it to last all day without retouching. Apply loose translucent powder with a large brush and then using a clean brush, wipe away the excess. Leaving extra powder on will give you an ashy finish.
Step 11: Eyeliner is for everyone. There are no ways to go wrong with eyeliner. Start in the inner corner of your eye, stay as close to the lashes as you can and draw in one motion towards the outside of your eye. When applying on the lower lid start at the outside corner and work to the inside. Only go all the way to the inside bottom when looking for a statement finish. Liquid eyeliners demand perfection when you apply but give a sharp, finished look. Cream or wax eyeliners are more forgiving of mistakes, can often be blended and give a softer edge. Gel eyeliners dry quickly, often give a subtle shine but can dry out your eyelids.
Step 12: Eye Shadow doesn’t have to be a chore. When choosing an Eye Shadow, start with neutrals that compliment your eye color, not colors that match your eye color. Apply a soft shade close to your skin tone and apply all over the eyelid. For a natural, everyday look choose a complimentary color and apply in a sideways “v” shape at the outside corners of your eyelids. Angled brushes work perfectly for creating a soft, completed look. Adding layers and more colors will achieve a more dramatic finish. Blend colors to avoid hard lines which can be distracting. Buying colors in quads or palettes will give you coordinating colors but this is where you get to have fun with your make-up so experiment!
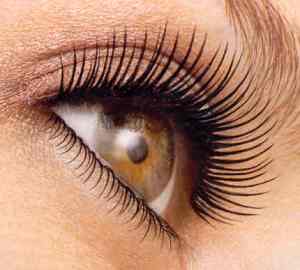
Step 13: Mascara that does. This last step will complete your entire look and really make your eyes pop. Maybelline Colossal Mascara gives your lashes both volume and length. To apply mascara place the wand bristles as close to the eyelash roots as possible and then slowly pull the bristles thru the eyelashes, coating each one. Apply 2-3 coats without letting the mascara dry in between applications to avoid clumping.

Best in Swiss Skin Care & Cosmetics


 Step 1: Understand your skin type. Following a daily regimen will help to even out and balance every skin variety. Skin types vary from dry to oily to very damaged and it is important to assess what your skin needs are and then address it every day. If you can’t determine your skin type on your own consult an Aesthetician or Dermatologist. Consistent and careful skin care will not only help you look your best now, but for years to come.

